PROTO XRD
RESIDUAL STRESS MEASUREMENT
The Most Accurate, Reliable, and Modular XRD Residual Stress Measurement Systems
First, Proto® provides world-class instruments to universities, laboratories, and manufacturers across numerous global industries. With a skilled team of technicians and experts, we deliver customised systems that optimise measurement efficiency and accuracy. Moreover, our patented technology and advanced software keep Proto® at the forefront of the residual stress industry.
Next, customers can select from our LXRD Laboratory systems, flexible iXRD Portable systems, innovative roboXRD systems, or ultra-portable mXRD systems.
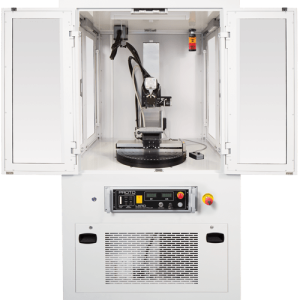
LXRD®
The ultimate high-power production and R&D platform.
Contact Us For More Details
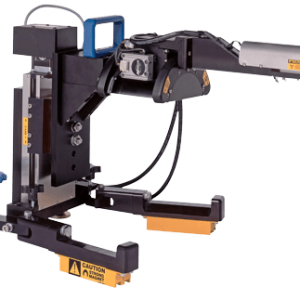
iXRD®
Unparalleled flexibility, modularity, and portability.
Contact Us For More Details

roboXRDTM
Advanced positioning capabilities for complex shapes and surfaces.
Contact Us For More Details
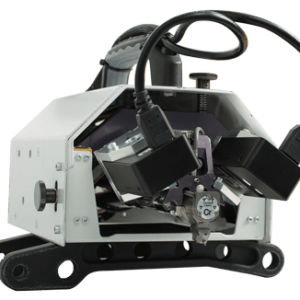
mXRD®
Ultra-portable accuracy for field measurements.
Contact Us For More Details
Proven Technology
Proto® systems use the industry-accepted sin²ψ multiple exposure technique (MET) for reliable, time-tested residual stress measurement. Additionally, this proven method handles complex geometries, preferred orientations, and large grains with consistent accuracy.

Accurate Results
Unlike cos-alpha and single exposure methods, which create large errors, sin²ψ ensures comprehensive data and low measurement errors. Therefore, you can trust Proto® systems to deliver accurate results, even under challenging material or data-collection conditions.
Supporting Engineering Excellence
You measure residual stress to ensure performance, safety, and quality. Consequently, Proto® ensures your engineering efforts remain supported with the world’s most accurate measurement technology. Our systems deliver precise results for parts of any geometry or material, especially safety-critical or life-limited components.
Customization Options
Furthermore, we offer modular options like residual stress mapping, advanced goniometers, and state-of-the-art detectors. You can also expand system power with add-ons for retained austenite, pole figures, or nitride analysis.

LXRD MEASURING A COIL

mXRD MEASURING A SURFACE

iXRD MEASURING A BLADE

iXRD MEASURING AN AEROSPACE PART
RESIDUAL STRESS SOFTWARE
At the core, Proto XRDWIN® 2.0 software provides powerful yet intuitive stress analysis tools. It supports linear regression, Dolle-Hauk, and triaxial methods while offering advanced peak fitting for reliable results. In addition, clear graphical displays make data easier to interpret, ensuring confidence in your analysis.
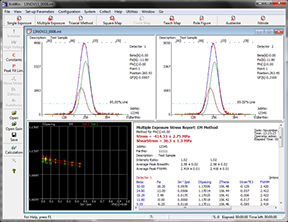
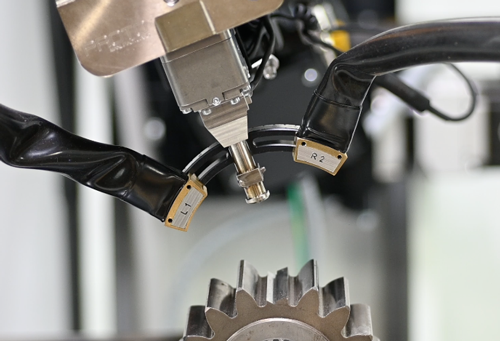
ADVANCED X-RAY DETECTORS
Proto’s proprietary PSSD detectors provide unmatched speed, stability, and wide 2θ range. Unlike competitors’ detectors, ours do not deteriorate with X-ray exposure, eliminating costly replacements. Moreover, dual detectors enable precise shear stress measurements and flexible positioning in multiple geometries.
RESIDUAL STRESS MAPPING
As pioneers of stress mapping, Proto® continues to deliver efficient, advanced mapping technology.
With the LP200 Profilometer, you can now generate complex residual stress maps faster and easier than ever.
Additionally, the LP200 supports Cartesian coordinate mapping, fully integrated into Proto® stress mapping software.
STRESS-VERSUS-DEPTH PROFILING
The LP200 also enables accurate depth measurements, producing detailed stress-versus-depth profiles for precise engineering analysis.


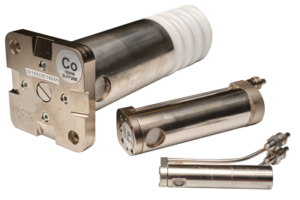
ROBUST X-RAY TUBES
Proto® manufactures fine-focus metal/ceramic X-ray tubes in-house, optimised for residual stress and retained austenite measurements. Additionally, tubes come in multiple sizes, power ratings, anodes, and configurations for versatile performance.
SAFETY FIRST
Finally, Proto® prioritises both operator safety and instrument longevity. All systems comply with international safety standards such as ANSI N43.2. Moreover, safety interlock panels, radiation protection, and warning beacons ensure full operator awareness and protection.


